

Apr22
READ THE POST


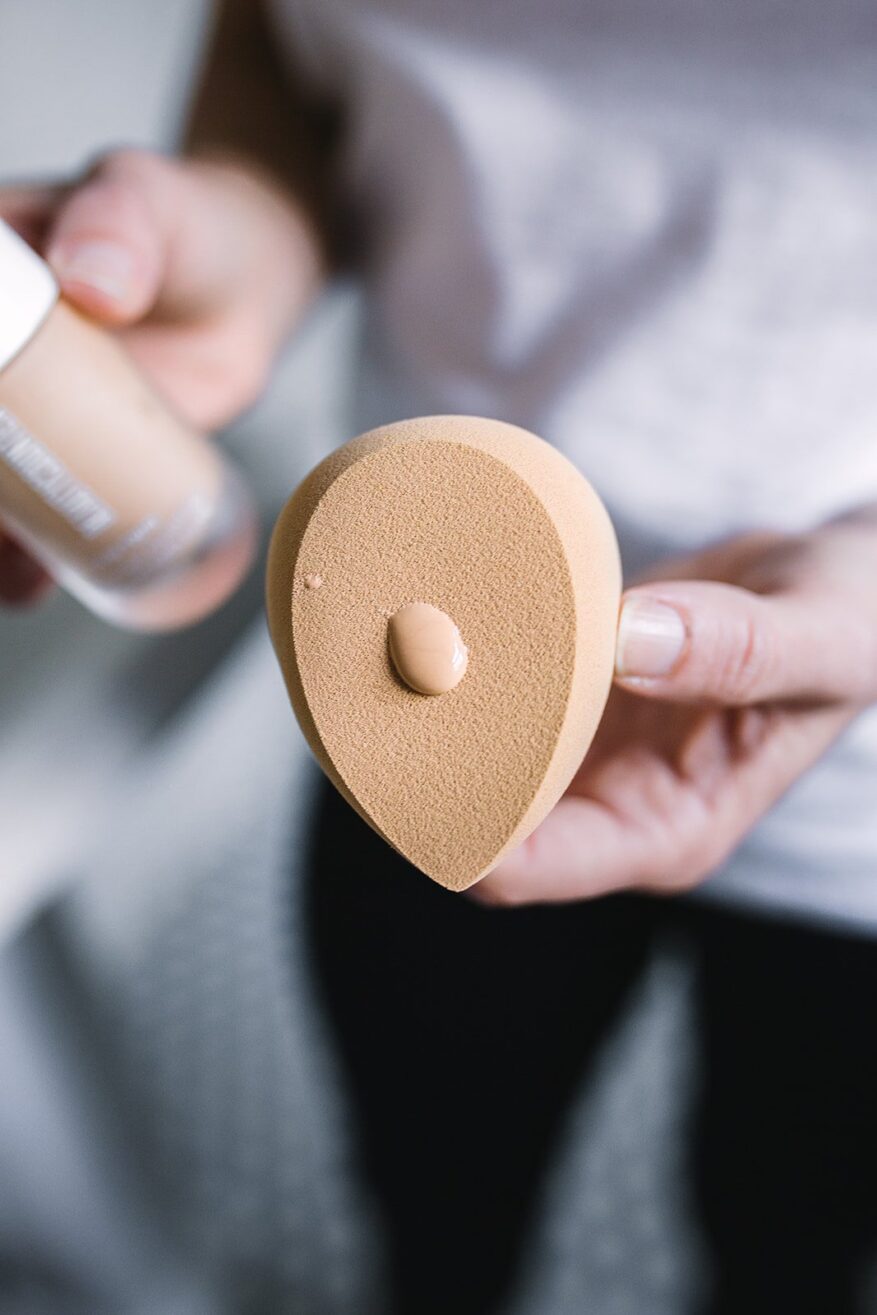
Make foundation look more natural and blend perfectly with a beauty sponge. I share tips on how to keep it clean too!
While Beautycounter has had a foundation brush for years, a makeup sponge was in the works for a while since so many people prefer the type of coverage that a sponge provides. But they wanted to make it better than other makeup sponges on the market. And I’m sharing today why it is! I explain how to use the Beautycounter Better Blender and instructions on how to clean it.
I never loved foundation, but instead preferred tinted moisturizer. That is, until I discovered Skin Twin. At the same time I got hooked on foundation, I used a makeup sponge for the first time — the Beautycounter Better Blender — I finally feel like my foundation looks absolutely perfect. It’s never too heavy, never streaky and looks like I have flawless skin that’s not overly made up. (Clear skin helps too! I LOVE Beautycounter skin care.)
Before I used a beauty sponge, I used a foundation brush, and like each option for different reasons. (You’ll see both options used in my makeup tutorials.) I find a sponge is easier to use than a brush and gives a more airbrush finished look, while the foundation brush doesn’t require me to really look in the mirror (i.e. I can walk around and just rub it into skin without looking!). But, a foundation brush sometimes leaves little streaks on my skin that I have to smooth out with my fingers — or the sponge.
So, if I had to choose, a sponge is my preference! The sponge does require slightly more time (first to wet it and then to press it in and buff) but I prefer the finished look more so it’s worth it.
The Beautycounter Better Blender (say that three times fast) is similar to the famous BeautyBlender, but with some upgrades. This design of Beautycounter’s makeup sponge has three dimensions for different purposes:

The Beautycounter Better Blender was designed by Christy Coleman, a professional makeup artist and the Chief Artistic Director at Beautycounter. (Fun fact: she does a lot of celebrity makeup for red carpet events.)
It’s made with a super-soft and fluffy latex-free material for the best makeup application and a seamless, second-skin feel. Not only does it make your makeup look perfect, it’s also a really clean tool that won’t transfer bacteria to your skin (as long as you’re cleaning it regularly – more on that below!).
Beautycounter’s Better Blender costs $22 and other makeup blenders that you may find at drugstores or Sephora are often as cheap as $3. So why does this one cost more? Like all Beautycounter products, when you compare it to cheaper options, the difference is QUALITY. Quality impacts how well it works and how long it lasts.
A more expensive makeup sponge, like the Better Blender, is super soft on skin and less likely to cause irritation, particularly for those with very sensitive skin. Additionally, this sponge can be washed repeatedly and will last a long time while cheaper sponges start to fall apart or tear when you wash them.
When you soak the makeup sponge (or on that below), not all sponges swell as much as this one, and that impacts how makeup is applied. That also means that it won’t absorb as much product, which means you can use less foundation and concealer (i.e. you get a longer life out of those).
You can go right into applying your blush, or you can use a large powder brush to applying a setting or mattifying powder first before moving onto bronzer, blush, and/or highlighter powders.

It’s really easy to wash and keep clean and it’s materials are durable enough to stand up to repeated cleansing! To clean it:
Wash your makeup sponge about 2x a month!
This sponge gives me such good coverage with sooo little work. I bounce it around my face and it goes on so perfectly. I also love that I can clean it so easily. With my foundation brushes, I have to let them dry after cleaning, but the sponge is supposed to be damp when you use it!
I have an IGTV where I use this sponge, here! And see my skincare and makeup routine here.

Shop the Better Blender Sponge here.


Leave a Comment