

Mar13
READ THE POST


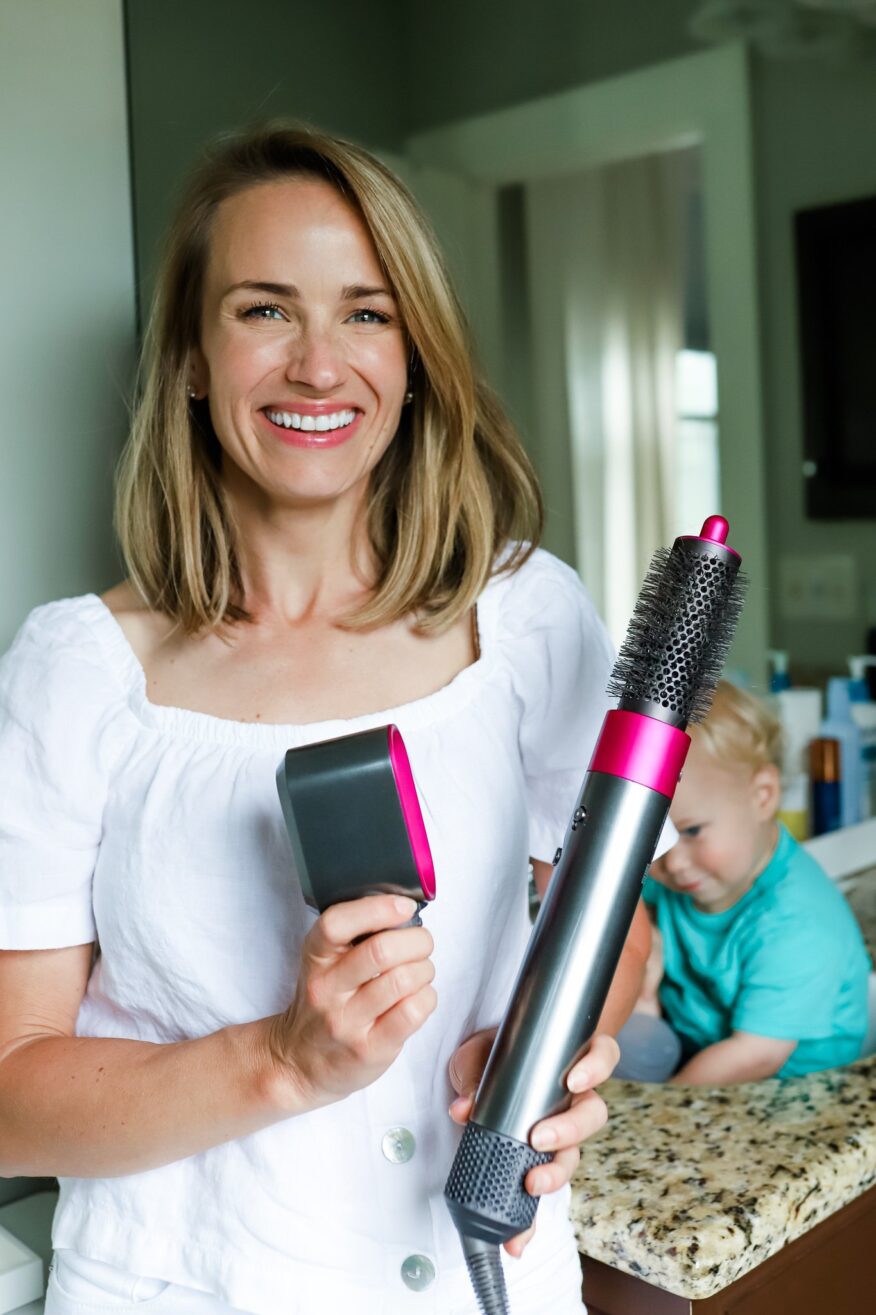
Like many of us, I had my eye on the Dyson Airwrap for some time. It took me a few months to finally decide to buy it, and then once I decided to purchase it, I couldn’t find it anywhere online. One night I checked Dyson’s website and somehow thought to check their refurbished section and they had ONE Airwrap on that page. So I ordered it as quickly as I could. I was a little unsure about how it would work on shorter hair, but after a few google searches, I noticed that there were lots of women using the Airwrap for short hair…and it looked GREAT.
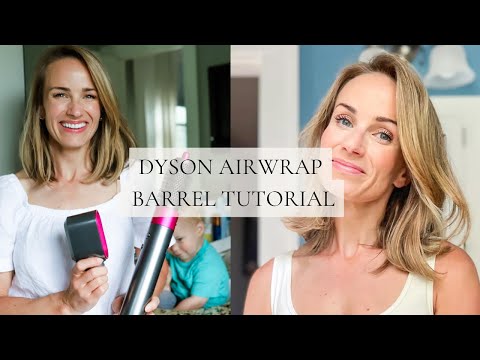
Needless to say, when it finally arrived, I was thrilled to try it out. So today I’m going to share how I use it for short hair, and why I LOVE it. I’ll get into more details below! There’s also video below to show you how I use it, as well as this Airwrap reel so you can see the tutorial in action!


Before using the Dyson Airwrap, I always wash my hair. Starting with wet, clean hair has given me the best results.
My favorite shampoo and conditioner is by Beautycounter. I’ve used it for years and while it’s nothing fancy, it works well and it’s clean. And if I’m not using the Beautycounter products, I’m likely using Colleen Rothschild shampoo and conditioner, which are my other favorites.
I use Divi Scalp Serum on my hair once it’s towel dried. I apply about 3/4 a dropper right at the roots, especially. And I make sure to focus near the front where I have some postpartum hair loss. I’ve been using this for about 4 months and am blown away by the new hair growth I have!
I use the ELEVEN I Want Body Foam on wet hair. It gives me great lift and volume without any crunchy feeling. It also smells amazing. I use 2-3 pumps and apply it only at my roots.
Then before I use the blowdrying attachment, I use a small amount of this Colleen Rothschild Shine Serum just to bottom half of my hair. It helps nourish and protect my hair from the heat, while also making sure it stays smooth and shiny.
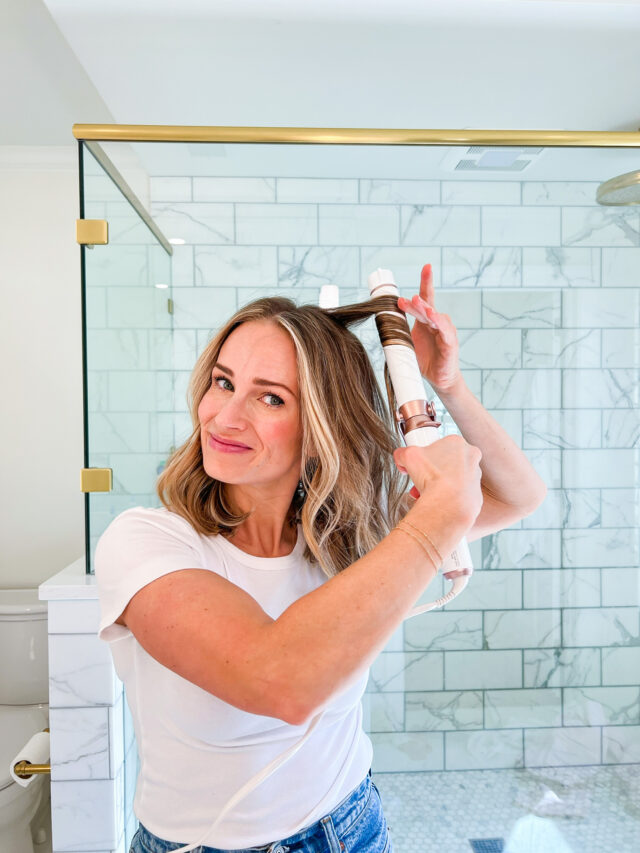
Now I start with the Airwrap. I use the pre-styling dryer attachment on my wet hair until it’s about 80% dry. If you try to use the other styling tools on dry hair, they won’t work super well.
I also have the Dyson supersonic hairdryer, but I use that when I’m not pulling out the airwrap, since the airwrap also has a blow dryer attachment.
Once my hair is about 80% dry, I switch to the volumizing round brush attachment and dry my hair layer by layer. I use the pre-styling dryer attachment on the highest heat setting but I switch the heat to medium with the round volumizing brush since it gets VERY hot.
I haven’t perfected wrapping my hair around the brush so I just pull it straight up, away from the roots to create volume. Using my hand, I gently press my hair against the brush to create a little bend in it from root to tip. I do this the same way I would use a traditional round brush and hair dryer, pulling my hair away from my head at the roots and working it into a slight curl at the ends. And I just don’t wrap it all the way around the brush. I can accomplish that on the left side of my head but not my right so I guess it takes coordination I don’t have yet! 🙂 I go over each layer multiple times until the section is smooth.
If I’m in a hurry, I don’t bother pinning up layer by layer. I just rough dry and then use the brush to smooth it and bend it under a bit. But doing it one layer at a time, definitely helps it look more polished, more curled and gives it more volume.
When I let the top layer out of the clip, I part it down the middle. Then, I start at the back and pull those strands straight up and under, with slight tension towards the front of my head. Then, I take the next section forward, picking up pieces on each side of my part and blow those straight up and curling towards the back. I may have to do this 1-2 times to get all the pieces dry.
I leave my bangs for the end of the blow out. Then I start with the shorter section of my bangs and use the volumizing round brush attachment to pull my bangs up and then directly forward, over my face. Then, I take the next layer beyond my bangs and bring those forward too. By this point, I’ve taken two sections back and two sections forwards.
I don’t do the top pieces directly out to the side since pulling the hair in a different direction that it typically fals helps create volume when it falls back into place. Then, when I flip it over for a side part (which I prefer when styled this way), there is extra volume and movement.
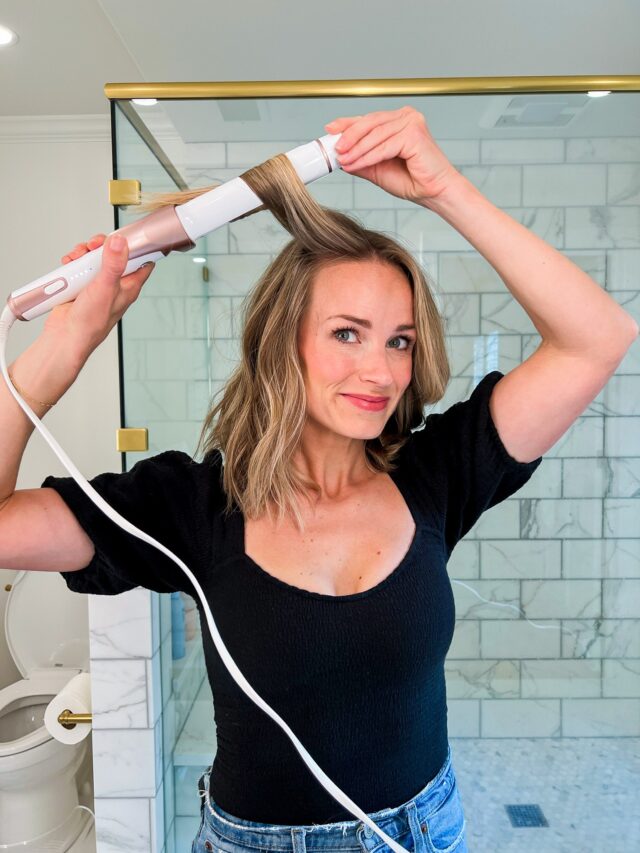
If I want to add extra curl, then I use the barrel attachments. I’ve learned that I need both the small and larger attachment for short hair, since it’s too short to really go around the big barrel. Then I use the big barrel for the top half for more volume. It takes a few attempts to figure out the barrel attachments, but the most helpful tip I’ve found is to let the barrel pull your section of hair into the barrel from the ends of your hair first (different than how I use a regular curling iron).
After I’ve dried and styled my hair, I use this ELEVEN AUSTRALIA I Want Body Texture Spray. I flip my head over and spray the roots, and then I’ll also spray the ends of my hair for a little extra texture and finish.
Then, I apply this Colleen Rothschild serum on my ends one more time for extra shine and to get rid of any frizz.

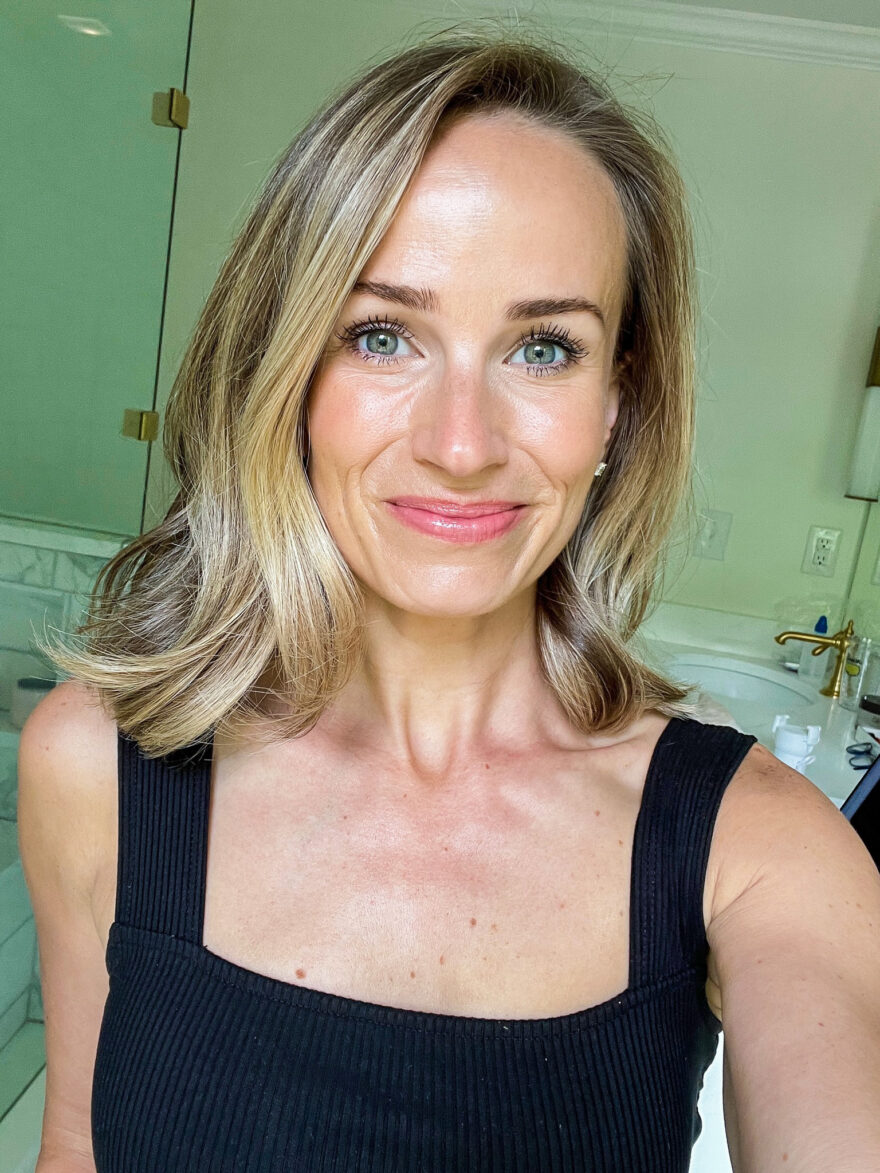
I truly LOVE the Dyson Airwrap. While it’s very pricey and hard to find in stock, it’s well worth it if you can get your hands on one. I specifically love how easy it is for me to create a salon-style blowout at home, anytime I want. Another thing I love about the Dyson Airwrap is that it’s powerful enough to dry my hair fully without using extreme heat.
I also really like the smoothing attachment (the new version comes with two smoothing brushes, a soft smoothing brush, and a firm smoothing brush) if I’m really in a hurry since that seems to be the fastest for me but I prefer the volume of the round brush. And I like the AirWrap barrels, but I’m not very patient using them and I’m so much faster using a curling iron. But, when I DO take the time I love the volume that those wands give me. The trick is to do a cold shot on your hair before letting your curl go from the barrel. While it is a challenge to learn how to use the Airwrap at first, with practice it becomes more effortless. The best part about the AirWrap is that you can get a ton of different hairstyles with one tool.
I got my refurbished directly from Dyson, but you can also find it at Sephora, Ulta, and Bluemercury when it’s in stock. You can also buy display stands for your Dyson airwrap styler if you prefer that over leaving it under the counter in the box it comes with (I like the box just fine).
Do you own the Airwrap or have it on your wishlist? If so, let me know in the comments below! And let me know if you have questions!
Shop the Post


Leave a Comment